Photo Manager
The Photo Manager allows you to upload and modify your photos.
- How Do I Get to the Photo Manager?
- Create a New Album
- Edit an Album
- Sort the Albums
- Delete an Album
- Upload Photos
- Modify Photos
- Sort Photos
- Delete Photos
How Do I Get to the Photo Manager?
- Log in to the admin.
- Click on the Admin tab to the left.
- Click Manage Photo Albums.

- The Photo Manager folder will load. The Photo Manager folder is divided in to two sections, albums on the left and photos on the right.
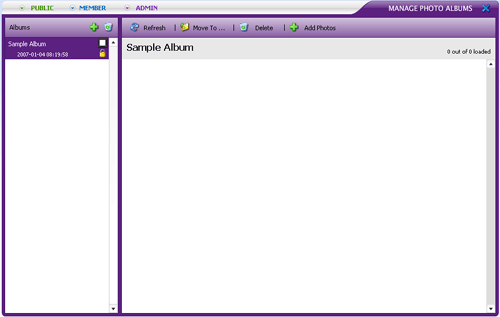
Albums
Albums allow you to organize your photos, much like you would organize your photographs in photograph albums.
Create a New Album
- Click

- A window will appear, asking you to type in the name of your new album.
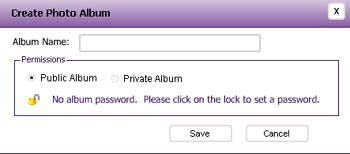
- Type in the name for your album.
- If you would like the new album to be available only to Members, check Private Album
- If you would like to set a password for the new album, click
 . Type in your new password.

- Click Save
Edit Albums
- To edit an album, click
 next to that album.
 - To rename, type in the new name for the album.
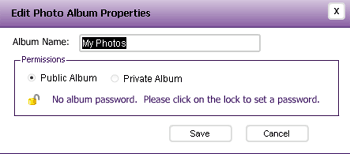
- Check the appropriate box to make an album Public or Private.
- Click the lock icon
 to toggle password protection on or off.
 - Click Save to preserve any changes.
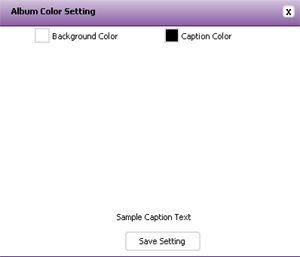
- Double-click the box icon
 to bring up a window to change the background color and/or caption color for that album.
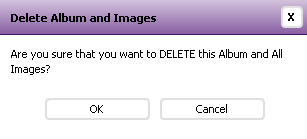
Delete an Album
- Click on the album's name to select it.
- Click

- In the confirmation window, click OK to delete, or Cancel to go back.
Sort an Album
Clicking on the "Sort" button will alphabetize the list of photo albums, lowercase a to z and then uppercase A to Z.
[Back] [Top]Photos
When you have clicked on an album's name on the left, the system will show you all of the photos in the album on the right section.
Upload Photos to an Album- Click the Photo Album you would like your images in, then click Upload Images.

- There are three locations an image can be added from:
- If the image is on your computer, click the first Browse button to find and upload the image

- If the image is from another website, type the full URL of the image, and click Add

- If you have already uploaded the desired image to another Famster component, click the final Browse button to find the image

- If the image is on your computer, click the first Browse button to find and upload the image
Modify Photos
- Double-Click on the desired image to Edit it.
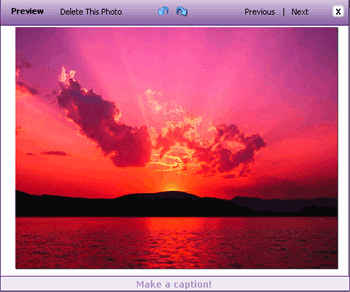
- To assign a new caption, click the existing caption, then delete any unwanted text and add the new caption.
- If you wish to rotate the image, click on either
 or
or  to rotate your image in the appropriate direction.
Sort Photos
- To sort your photos around, click on one of the photos that you want to move around. Click and hold down the mouse button.
- Drag the mouse in front or behind another photo - that is, move the mouse to the position that you want your photo to be in. Release the mouse button.
- Continue the process until your photos are in the positions you want them to be.
Delete Photos
- Click on the photo you want to delete and then click Delete.

- The system will ask you to verify whether you want to delete the photo. Click OK to proceed, or Cancel to go back.

